In this tutorial you will learn how to use SAMS to digitally phenotype a patient using an example case. This application can be used for genetic diseases as well as diseases without a genetic background.
So far, SAMS allows to encode signs/symptoms using the Human Phenotype Ontology and diseases/diagnoses from Orphanet and OMIM. For users in Germany, we also provide DIMDI (Deutsches Institut für Medizinische Dokumentation und Information) Alpha IDs.
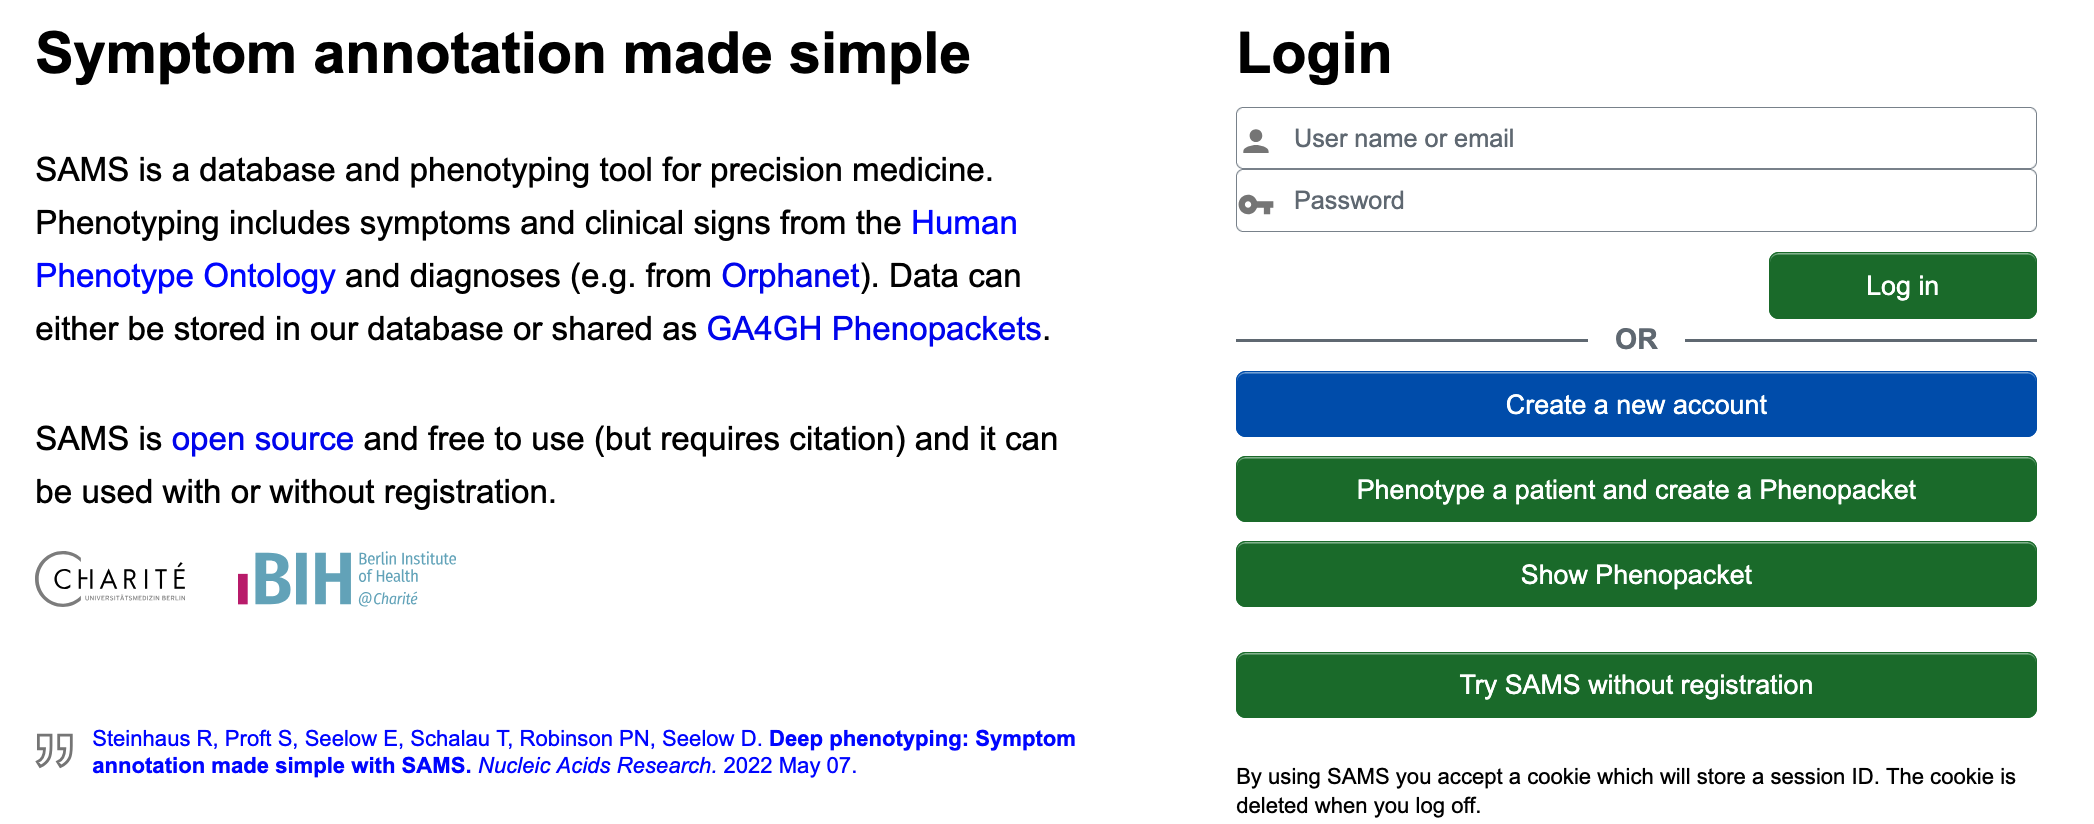
1. Use with or without registration
Registration is not necessary for exporting and sharing phenotypes as a Phenopacket, but it is required if you want to store your data. On the home page the button "phenotype a patient and create a Phenopacket" will lead you directly to the phenotype entry page where you can select signs, symptoms, and diagnoses and export them directly as a Phenopacket (for further instructions see below). You can also choose to "Use SAMS without login" which will give access to the patient list page. Here, you can create several patients with different visits, their records can also be exported as Phenopackets.
Please note that if you are not logged in, your input is not permanently stored and anyone can access (and modify and delete) it. Therefore, you must not record real patient data without logging in! To create an account, please state an email address and a self-selected password. Instead of an email address you can also select an account name – an email address is however required to recover lost passwords. You can also enter your name and institution or practice (but this is not mandatory).
2. Patient list
Login will lead you to the patient management page.
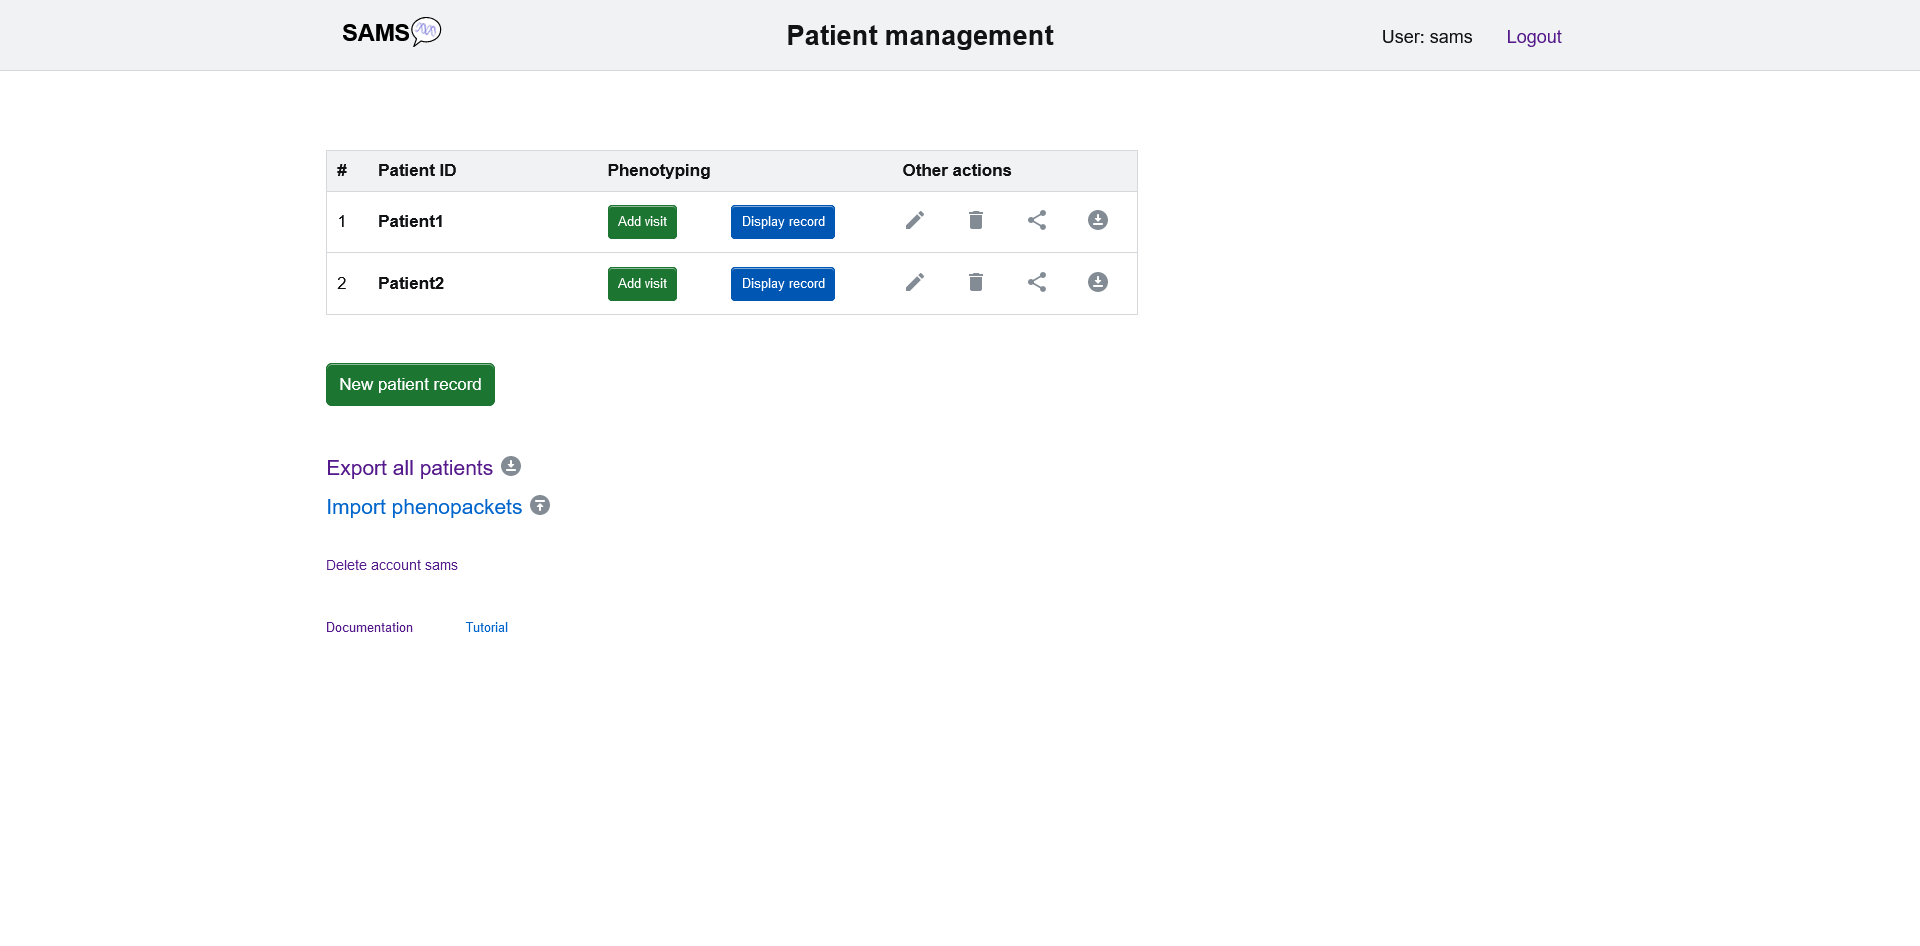
It exhibits an overview of all the patient cases you have stored so far. Your patients are displayed with the ID you have assigned. On this page you can create new patients, edit information, add visits, and see, export, and edit their record. To create a new patient click on "new patient record".
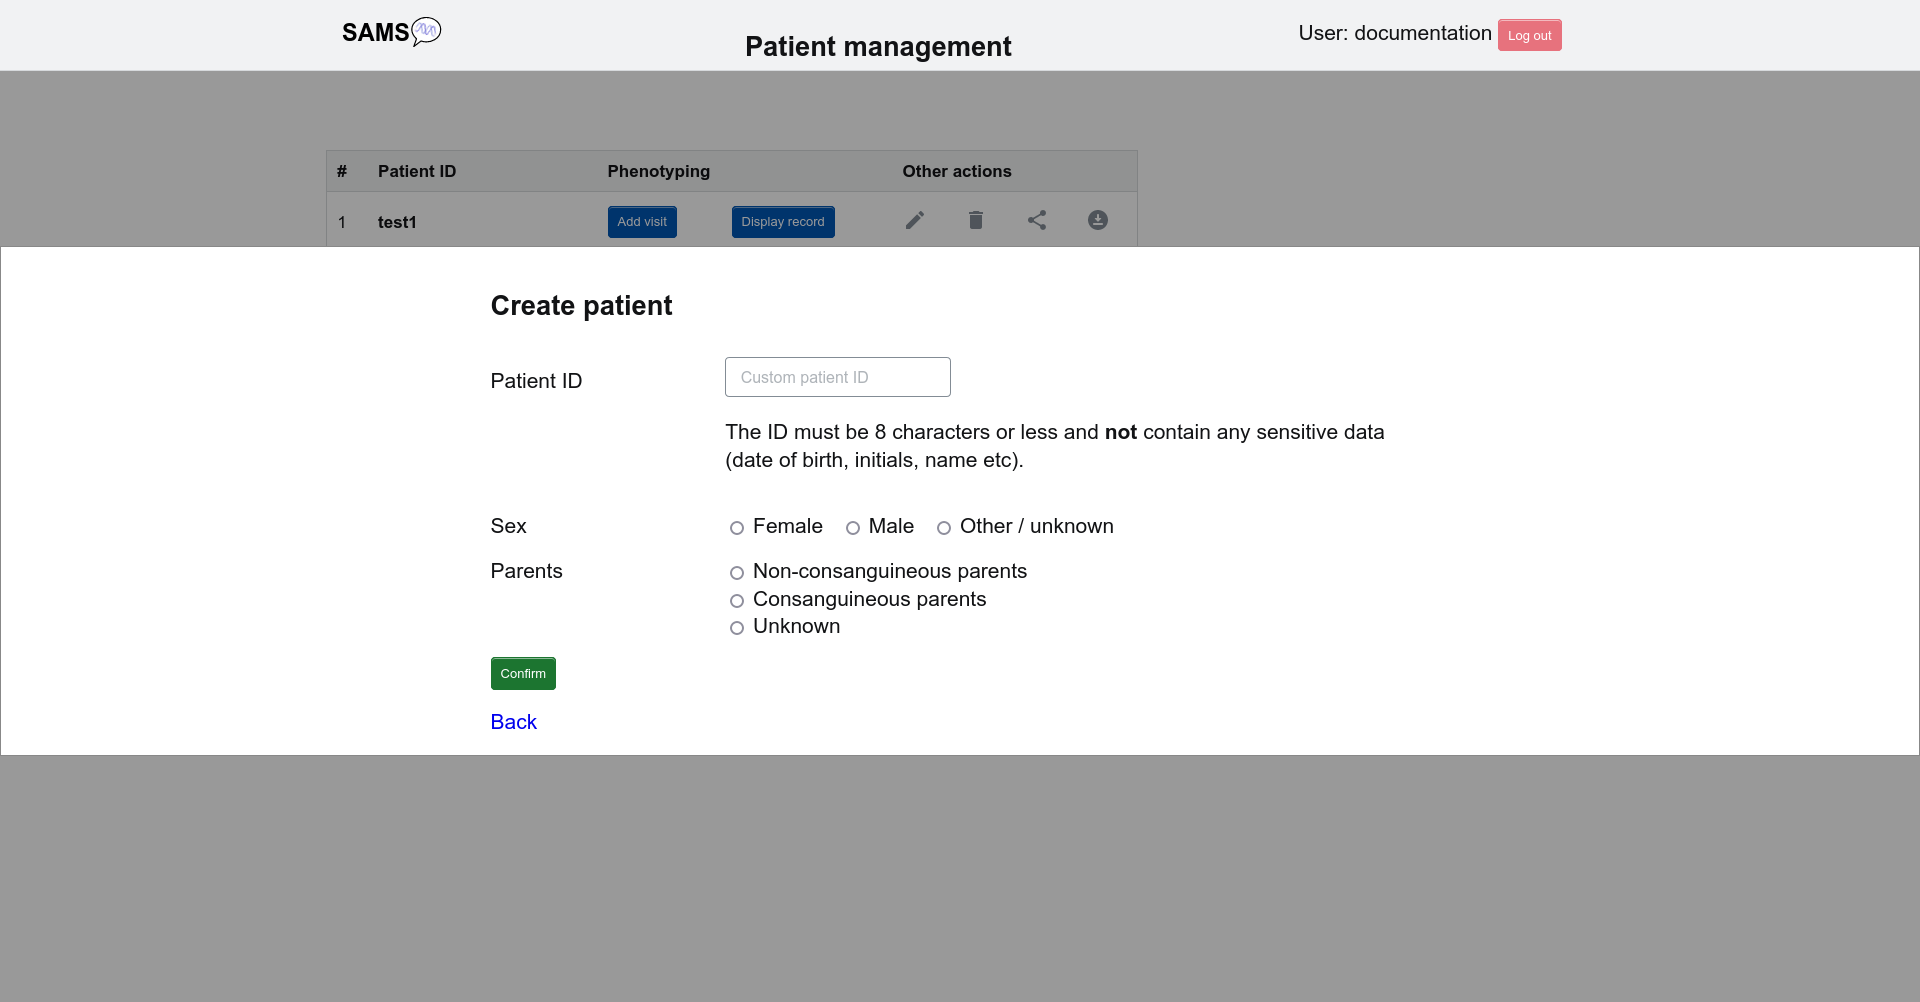
You will be asked to assign a patient ID consisting of up to 8 characters and not containing any sensitive data. You should also specify the sex and whether or not your patient is from a consanguineous family.
Clicking on 'add visit' will take you to the phenotype entry page.
3. Phenotyping
On the phenotype entry page you can enter and track the signs and diagnoses of your patients. Simply set the date of the visit and start typing in the 'Search Term' field. It has an autocompletion function starting the search as soon as three letters are entered. A drop-down menu will open where you can easily select the terms you are looking for.
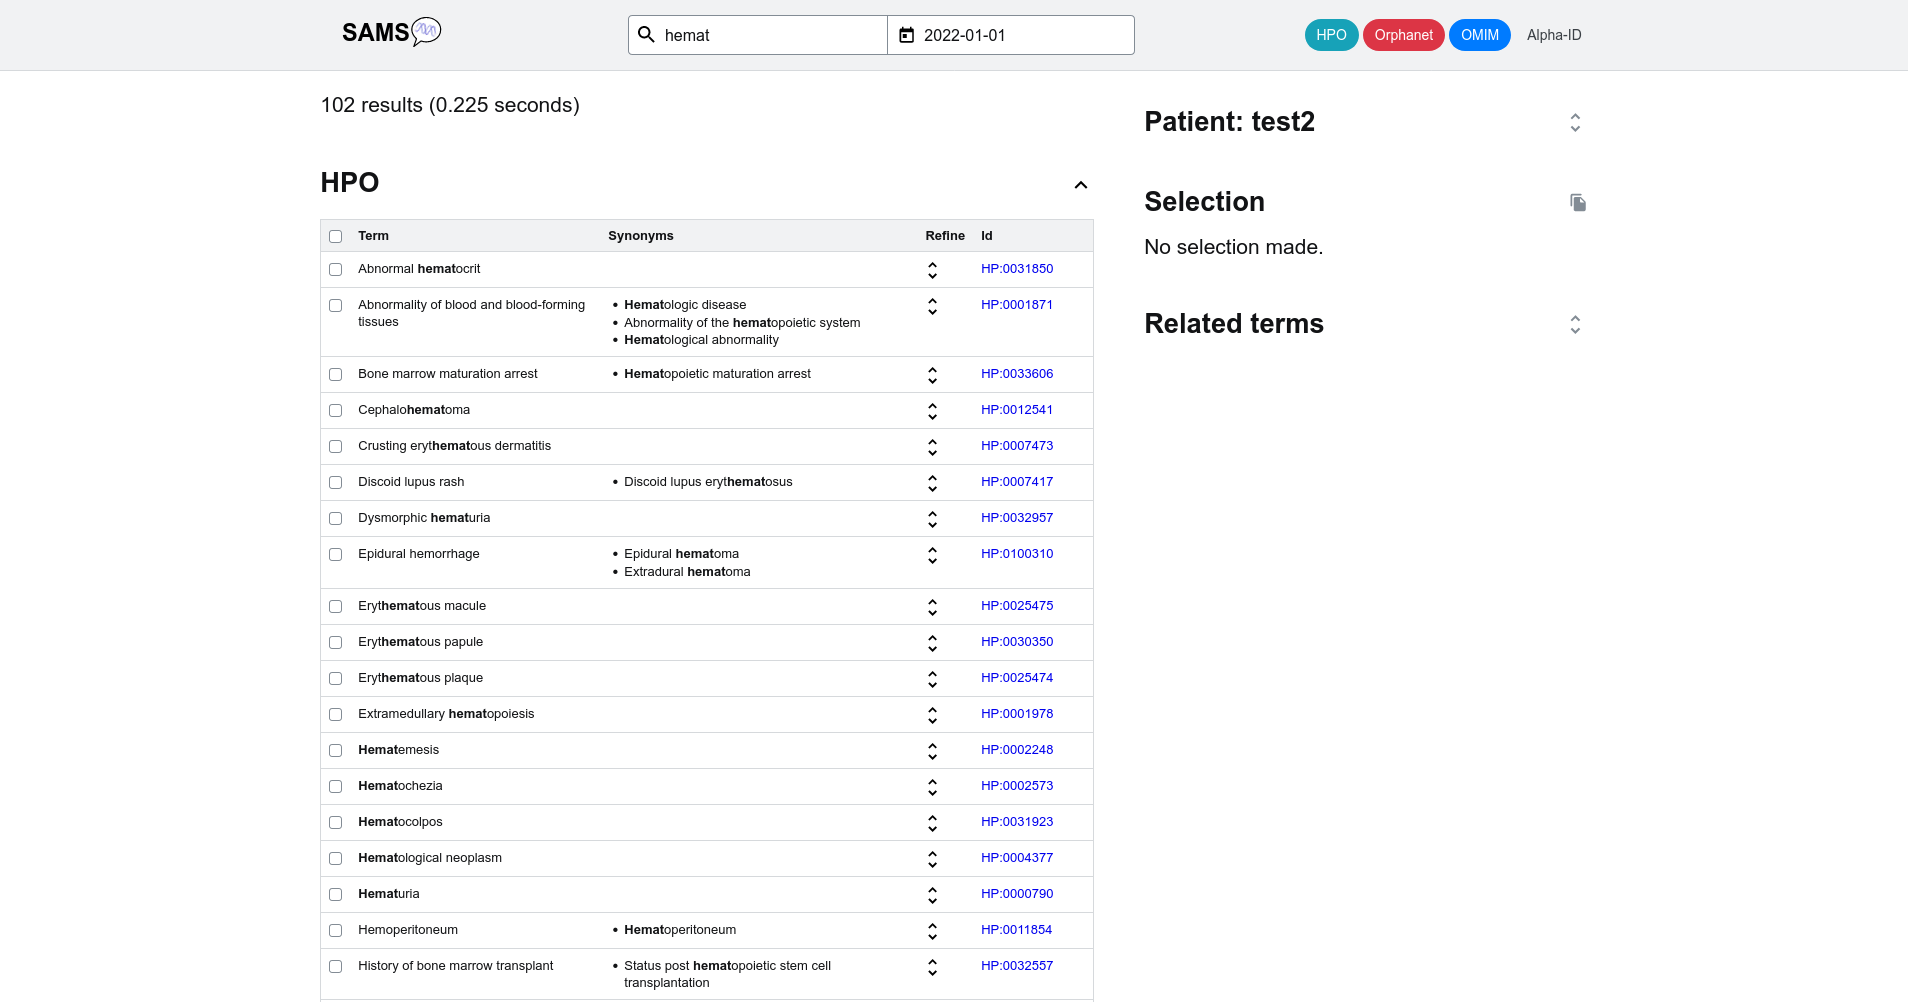
For example if you type in "hemat" you will be able to select from 109 terms such as "hematemesis", "hematuria" or "abnormal hematocrit", among others.
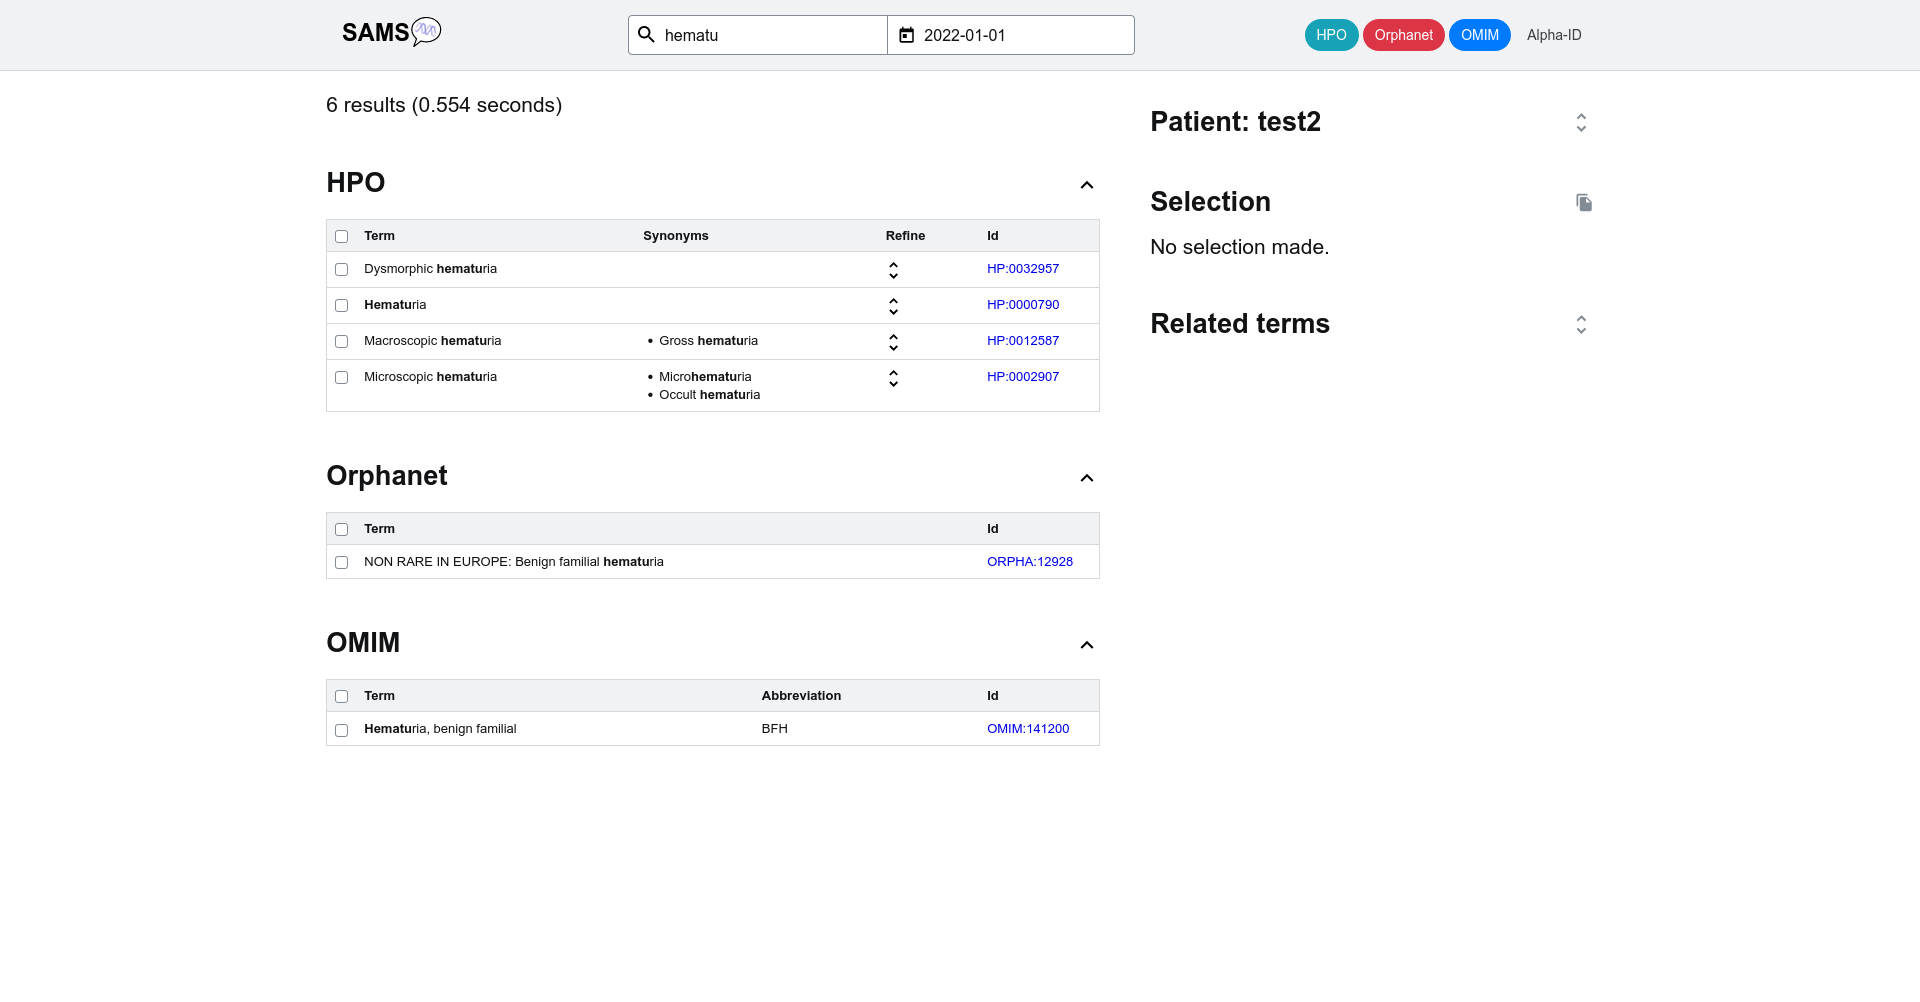
If you add one further letter ("hematu") the search will be further narrowed down to the clinical signs "Hematuria", "dysmorphic hematuria", "macroscopic hematuria", "microscopic hematuria" and the diagnosis "benign familial hematuria".
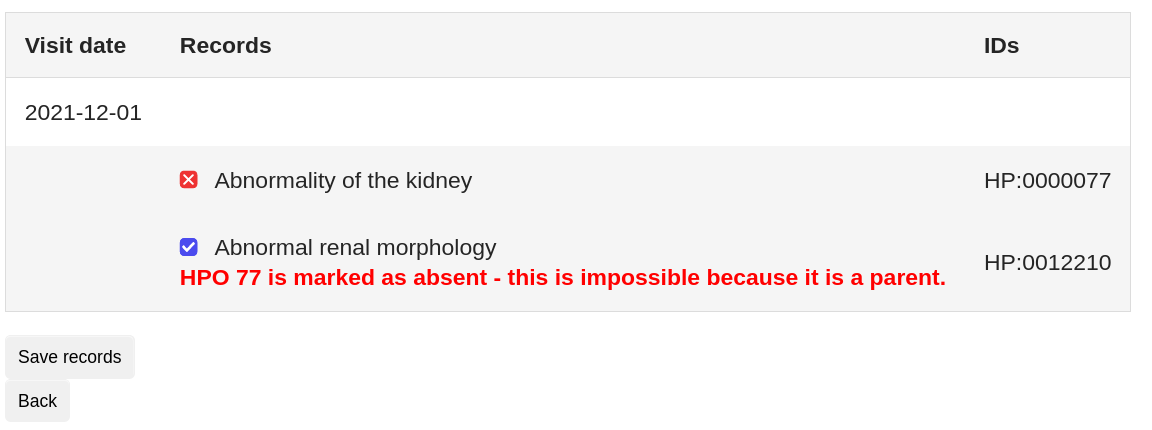
For the Human Phenotype Ontology, it is possible to further refine the term as subitems can also be selected. The parent term is usually non-specific (e.g. "abnormalitiy of the kidney"), the children more specific (e.g. "abnormal renal physiology", "abnormal renal morphology", "renal neoplasm").
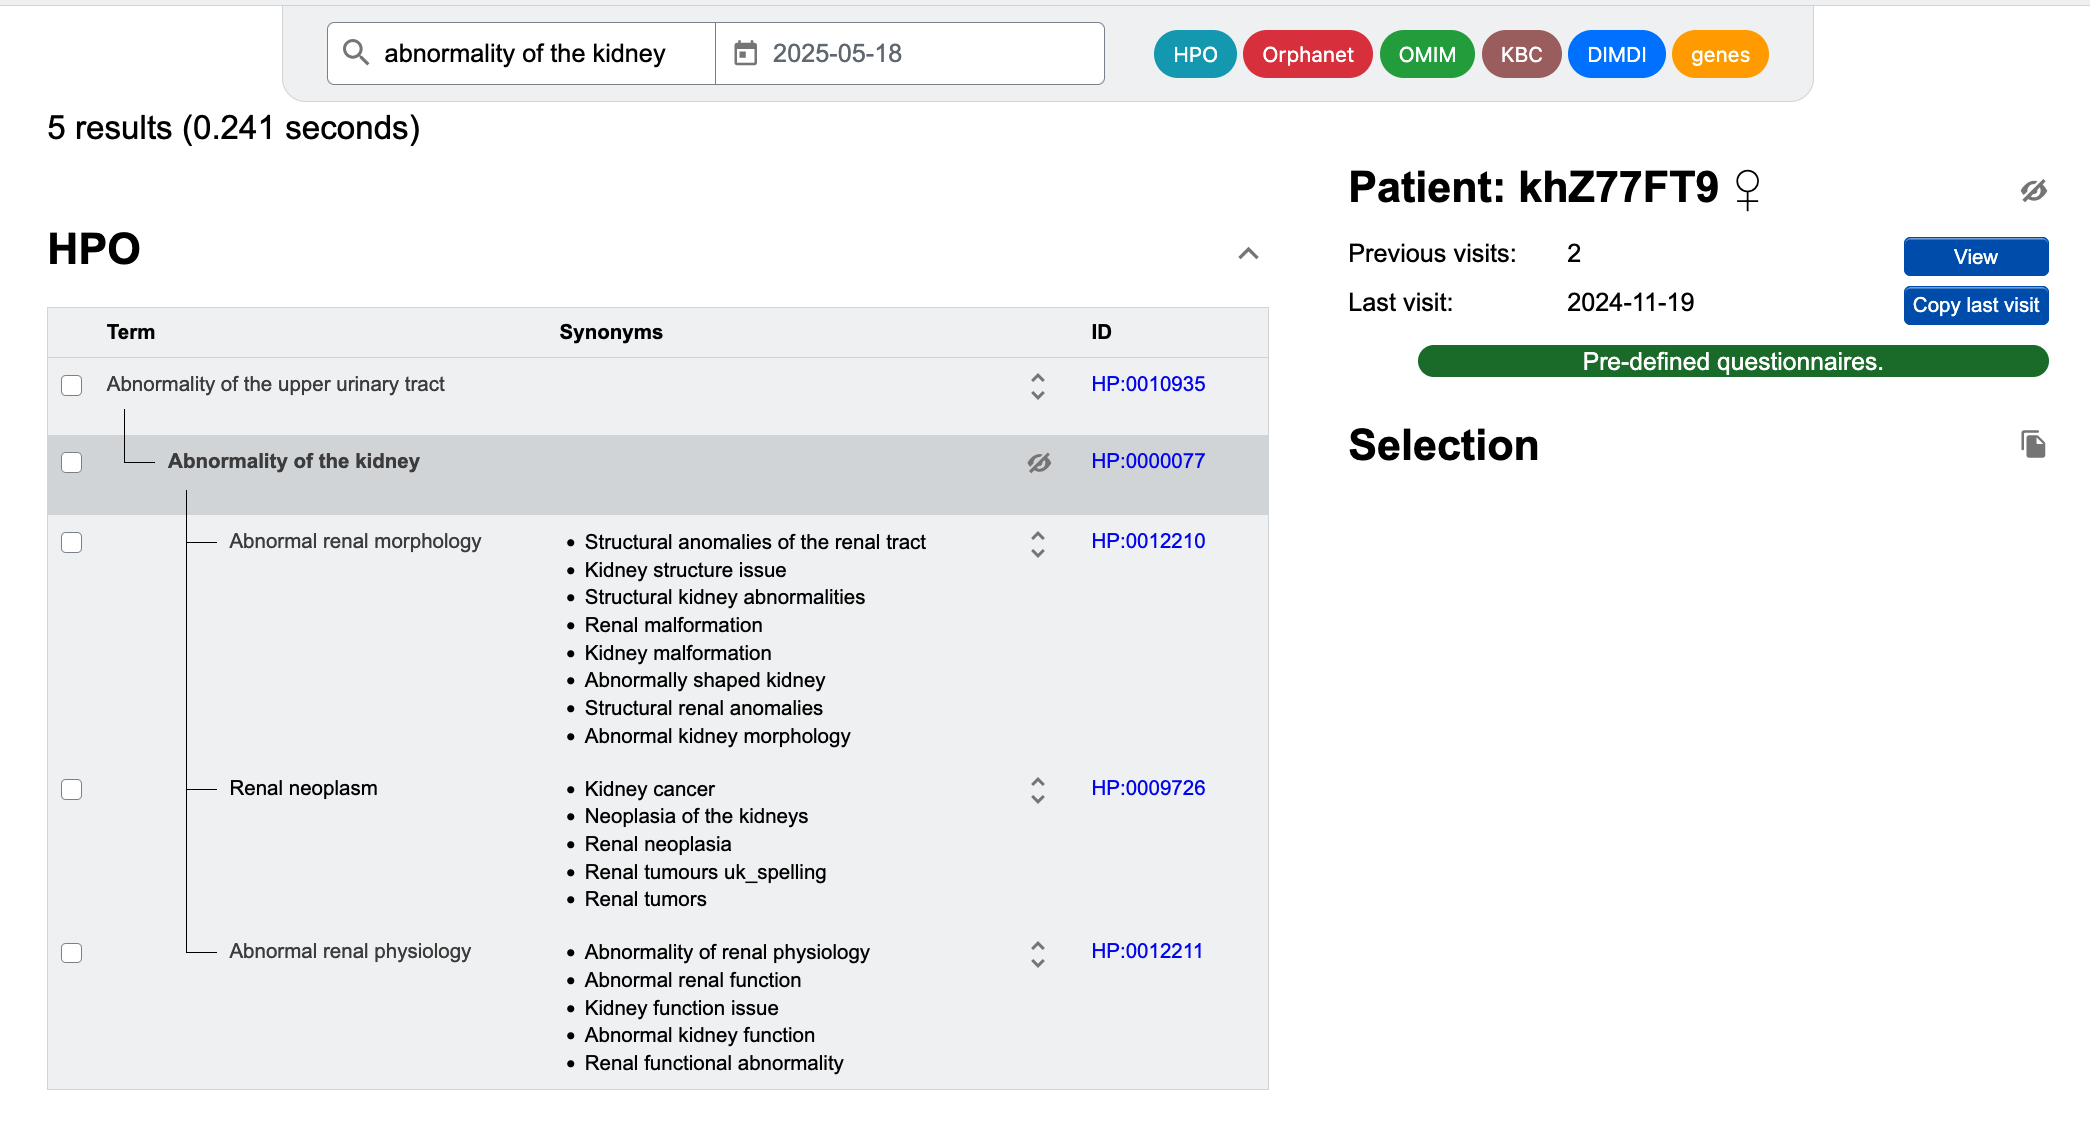
A click on the checkbox next to each term selects the term and enters it into the selection list on the right. Clicking the checkbox twice sets the selected entry to 'absent'. This function is useful to distinguish between unknown state and excluded.
The system issues an error message if you choose two contradictory terms that exclude one another (e.g. if you exclude "abnormality of the kidney" but choose "abnormal renal morphology").
Using the coloured buttons in the upper right corner, you can limit the search to specific data sources (Human Phenotype Ontology, Orphanet, OMIM, DIMDI Alpha-ID). Please note that in the default setting, Alpha-IDs are not included. If you want to include Alpha-ID terms in the search, you can click on the Alpha-ID button (it will then be highlighted in green).
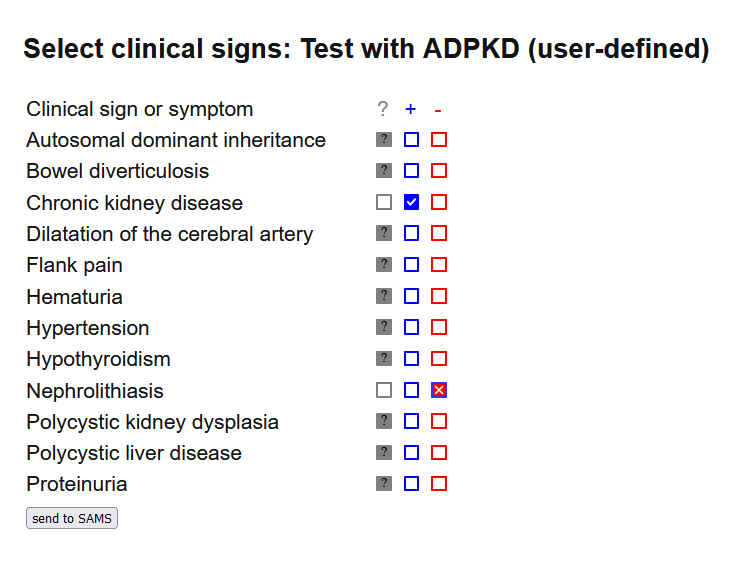
You can also use pre-defined list of terms that are either defined by users or derived from associations between Orphanet and HPO terms. You can either click on Pre-defined questionnaires to access user-defined lists of terms or select an Orphanet disease and click Choose signs.
When you are satisfied with your entry, clicking on 'save visit' creates a report which you can save in the database ("Save records to DB") and/or export as a Phenopacket "Export Phenopacket"). Please note that you must select either of them to store your phenotype data.

On the patient list page you can add further visits to your patient using the "add visit" button and specifying the date of the visit.
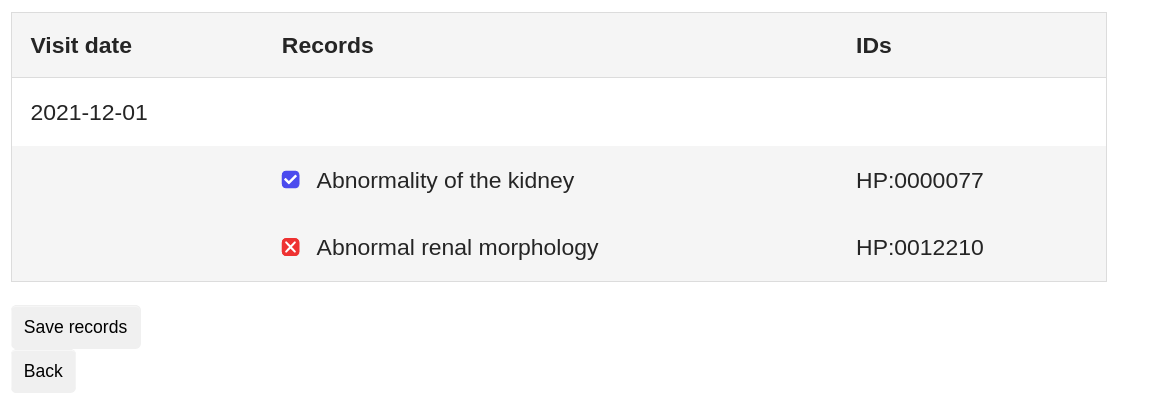
If you want to review your patient's history please click "Display record". On the subsequent page all the visits created so far will be listed.
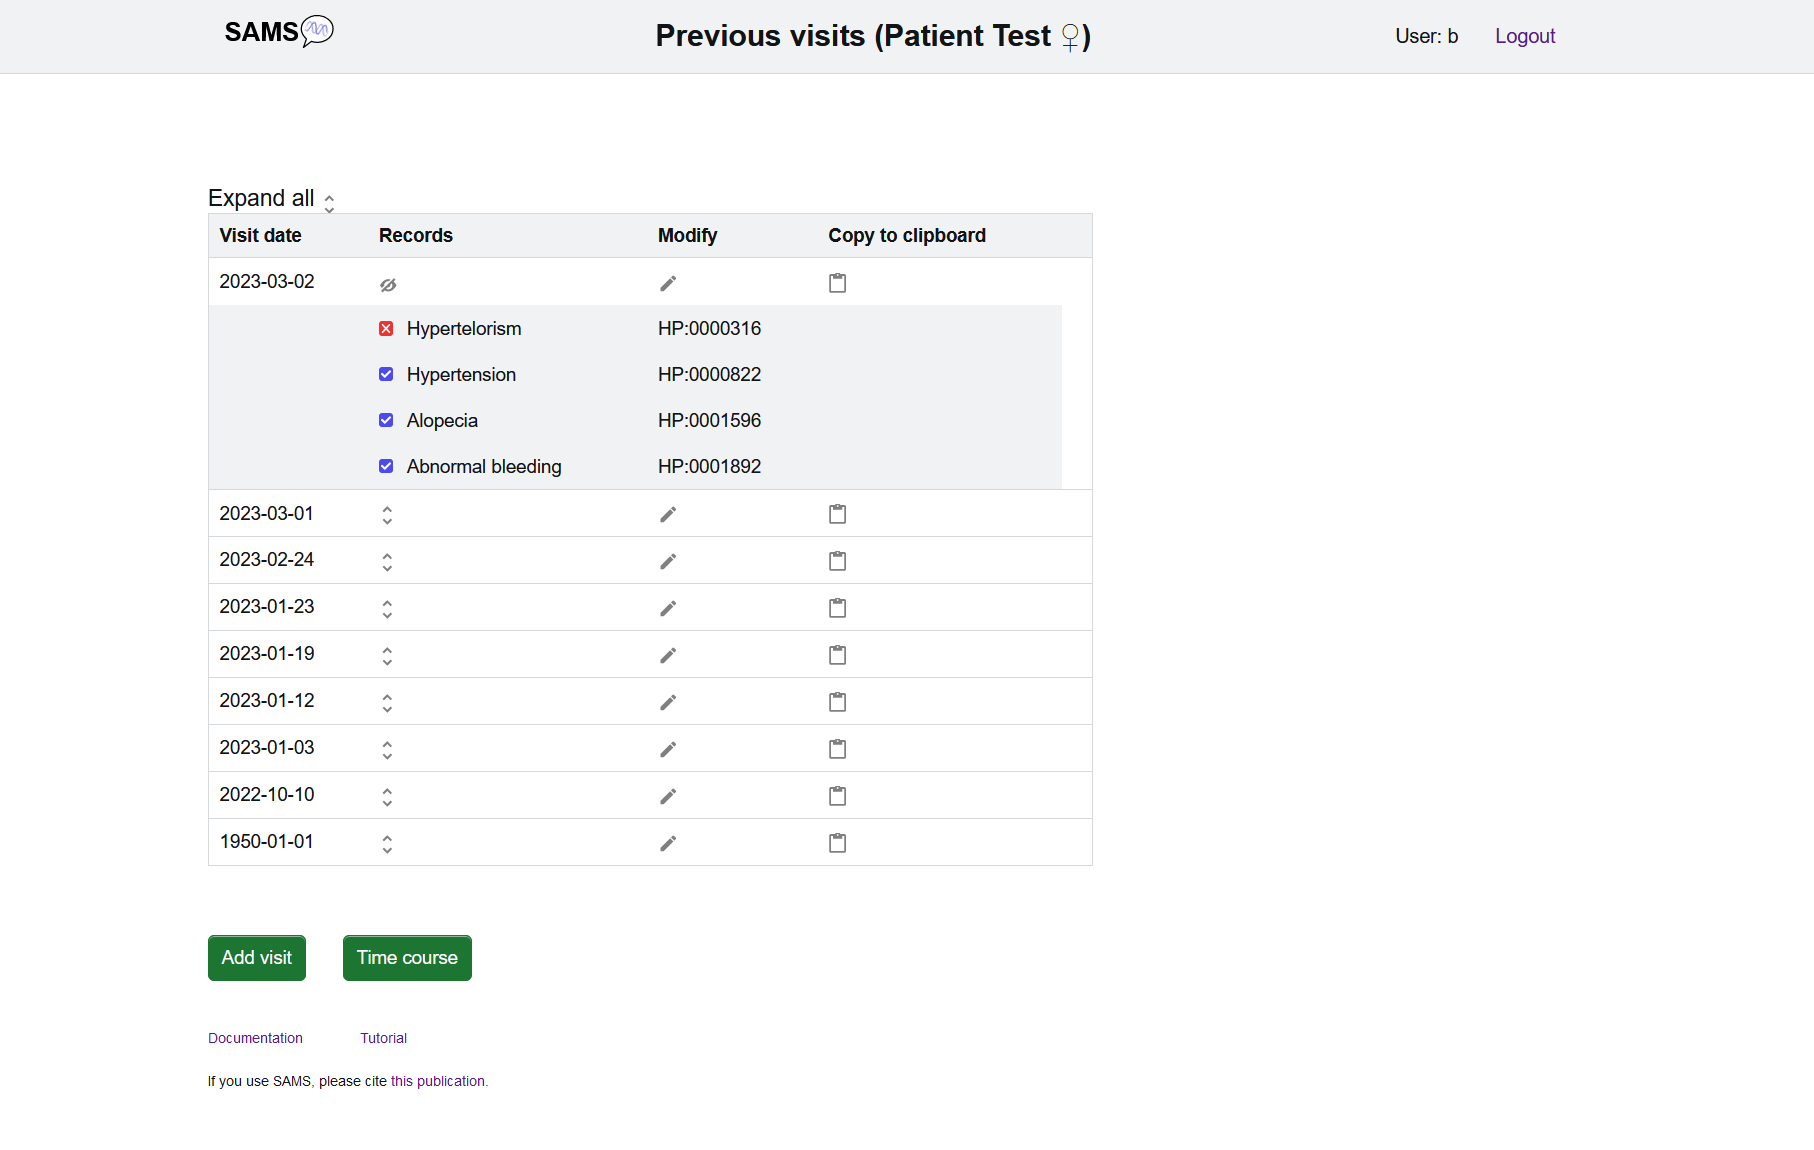
The "Time course" button shows the presence and absence of all selected findings and diagnoses over time.

4. Other actions:
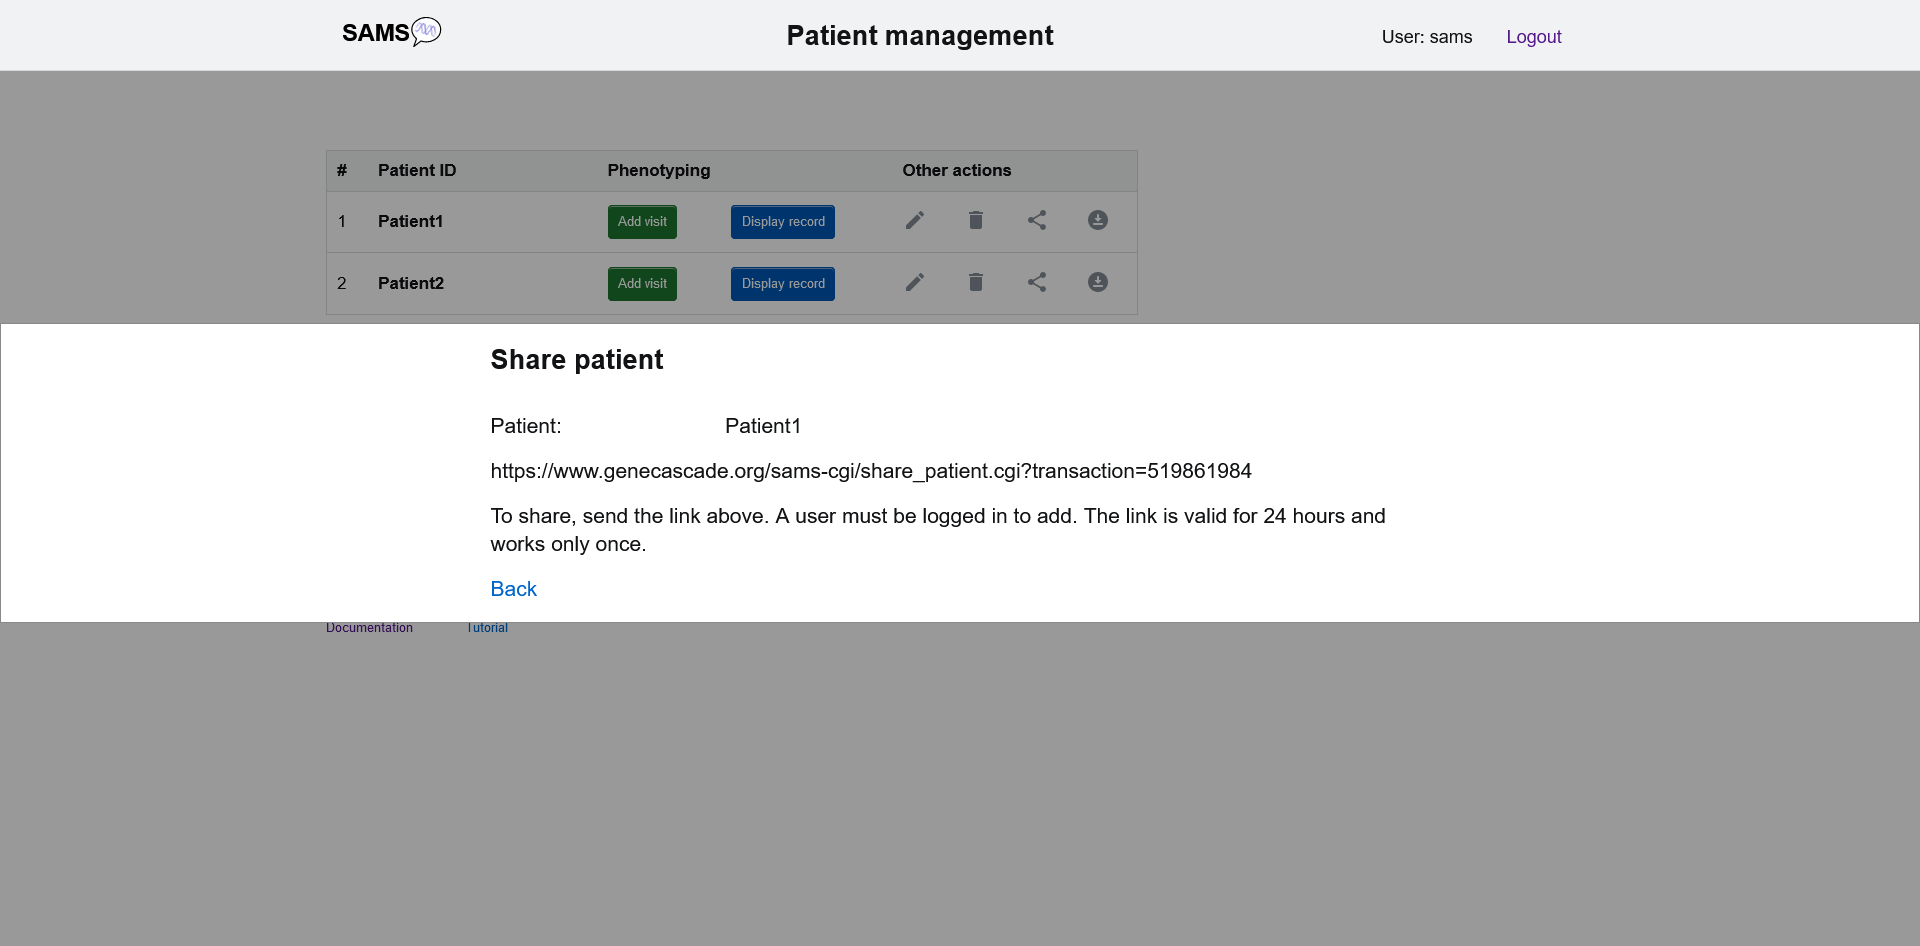
Share patient
On the patient list page there is also an option to share the patient record with a fellow user. A link will be created that works only once and is valid for 24 hours. The fellow user also needs to be logged in to SAMS.